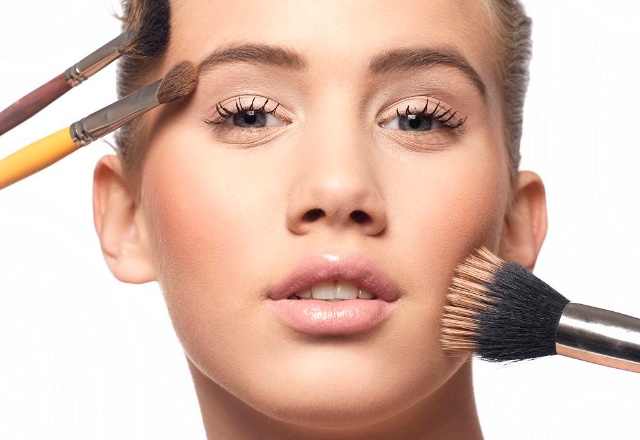
Makeup is something in which many women invest most of their time and money. It seems to play an important role in building confidence for a lot of people. And really, who doesn’t want to feel pretty? One thing we must keep in mind is that there really are no concrete rules in makeup application. But most of all, it is fun to put on makeup, so do what makes you happy! It may seem intimidating to the inexperienced but once you know the basic rules it becomes easy. In this article, we shall look at ways to put on makeup.
Steps to Put on Makeup:
1.) Cleanse to Put on Makeup
Before you put on makeup, you will first need to ensure that you cleanse your face well. This helps to prevent possible acne breakouts. It also aids in keeping your skin healthy and providing a clean canvas on which to apply makeup. Of course, it is recommended to do a thorough face-cleanse 2-3 times a month. But a simple and quick procedure is all you need for everyday makeup application.
You Will Need:
- A mild face wash (typically a cream or foam type).
- Liquid toner (optional)
- A soft face towel
Steps to Cleanse:
- First, wet your face with lukewarm water.
- Take a dollop of the face wash and rub it between your fingers to foam it up.
- Now, apply on the face and gently massage. Rub in small circular motions, and concentrate on your T-zone.
- Splash your face with water and wash off the soapy foam. Pat dry.
- Place a little bit of the toner on a cotton ball/pad and wipe across the skin. This step is optional and you can avoid it if you have very dry skin, or it is winter time.
2.) Moisturize Your Skin
The next step is to moisturize your skin. This is a very important step and you must not skip it. When you put on makeup, your skin absorbs it. This can result in irritation, dry skin, and acne or pimple breakouts if you do not take the steps to prevent this. In addition, it allows the makeup to sit better on your face.
You Will Need:
- A moisturizer suited for your skin type.
- Eye cream or serum
- Lip balm
Steps to Moisturize:
- Squeeze out a dime-sized dollop of your moisturizer onto your palm.
- Either dot it on your face, or rub between your hands and then massage into the skin.
- Massage with your fingertips in circular motions. This will help to promote blood flow under the skin and give your skin a gentle radiance.
- Next, with your ring finger dot on some undereye cream or serum.
- Massage this gently with your ring finger. This will help to reduce puffiness and nourish your undereye.
- Leave these on for 5 minutes to let it absorb before you move on to the next step.
- Additionally, you can use a homemade sugar scrub to exfoliate your lips. Then apply a hydrating lip balm.
Note: If you have oily-to-combination skin, opt for an oil-free moisturizer. For dry skin, look towards an intensive hydrating moisturizer. Select a formula that is right for your skin. Creams provide good hydration, but for a stronger approach, try a serum.
3.) Prime to Put on Makeup
While the foundation is touted as the base on which you put on makeup, a primer is what provides longevity. In addition, the primer is what actually gives you a smooth, even base on which to work. Primer is a clear gel that fills in the fine lines, wrinkles and large pores. This allows for the foundation to glide on smoothly. This step is especially relevant for use in the summer time, or in places where it is like summer time all year round. It keeps your makeup from melting off from the heat and sweat.
You Will Need:
- A good quality primer
- Beauty blender or triangular makeup sponge.
Steps to Apply Primer:
- Select a primer that is suited to your skin type. First, place little dots of primer on your face.
- For a smooth blend, use a damp makeup sponge or beauty blender. Use this to stipple and blend the product across your face.
- Otherwise, simply use your hands and pat onto your face like you would with a moisturizer.
- If you have combination skin, you can use 2 types of primer. Use an oil-free/oil-controlling one on your T-zone and a normal or hydrating one on the rest of the face.
- Leave it on for 5-7 minutes to allow it to absorb.
Note: Get a primer with SPF 15 or higher, so it can double as sunscreen for your face. A little goes a long way, so apply a few dots of primer before blending it out to a thin layer on your face.
4.) Apply Base to Put on Makeup
Now it is time to apply the base layer before you put on makeup. Choose your favorite foundation with to work. If you only want a sheer coverage, you can opt to go for a BB cream or just a tinted moisturizer. Otherwise, use a full coverage foundation to even out your skin tone.
You Will Need:
- Your preferred foundation
- Foundation brush
- Beauty blender
- Thermal water spray
Steps to Apply:
- First, place the foundation in dots on your face. Place it on your forehead, your chin, and on your cheeks near your nose.
- Then, spritz the flat foundation brush with some thermal water to dampen it.
- Use this to blend out the foundation, starting from the center then outwards. Blend in firm circular motions.
- Make sure to follow the circular motions and buff out the foundation well. Blend all the way down your neck to prevent any distinct seams differentiating between the makeup and natural skin tone.
- Now, spritz the beauty blender with the thermal water.
- Use to further blend the foundation in a tapping motion. This gives a more airbrushed finish.
- With whatever product was picked up by the beauty blender, buff the foundation lightly over your ears.
Note: Dampen the foundation brush and beauty blender before you use them. This allows for the foundation to glide on smoothly. It also prevents the application tools from absorbing too much foundation.
5.) Fill Your Eyebrows
All those who have naturally well-defined, luscious eyebrows look away! This step is optional, and for those who want to fill out their sparser eyebrows for a bold or strong look. Follow these steps to get bolder brows that look natural and well-defined.
You Will Need:
- An eyebrow pencil that matches your hair color.
- Thin makeup brush. Tinted brow gel or brow mascara.
Steps:
- Use the pencil to fill in your brows with short, dash-like strokes. You can achieve this with eyebrow shadow as well.
- With the dry makeup brush, soften the strokes so they do not look harsh.
- Now, use the brow mascara to comb through the hair and plump it up, as well as seal the color.
6.) Put on Makeup for Eyes
Now, you can put on makeup for the eyes. Either you can keep things clean and simple with just some liner and mascara. Or you can opt to enhance your features and add a pop of color with eyeshadows to complement your overall look. Once you choose the colors for your desired look, follow these steps to apply eye makeup.
You Will Need:
- An eyeshadow palette
- Gel or liquid eyeliner
- Mascara
- Eyeshadow brush
- Fluffy blending brush
- Smudger brush
- Angled eyeliner brush
Steps to Wear Eye Makeup:
- First, pick a neutral base color and apply this on the outer edges of the eyelid and blend inwards. This is your transition color, and it helps for a smoother blending of colors.
- Use the eyeshadow brush to place the darker color on the outer edges of your eyes. Place only a little at a time, and simply build up on this.
- With the fluffy blending brush, blend out the harsh edges and into the crease to create depth.
- Pick up the middle color with the eyeshadow brush and place on the center of the lid. Pat into place.
- Use the fluffy blending brush to soften the harsh edges between the 2 colors.
- Use a smaller brush to pick up the lightest color and place it on the inner corner of the eyes. This will lift your eyes and make them pop.
- Optionally, you can achieve a slight smokey look using the smudger brush. Pick up the shade used on the outer corner and blend it down right under the waterline of the lower eyelid. Blend this well.
- Now with the angled eyeliner brush, apply the gel or liquid liner in the shape you desire.
- Finish up your look with a generous coat of mascara on your lashes.
7.) Use Concealer on Spots
You can use this product to cover up any imperfections that shine through. Concealer is useful to cover up acne, red spots, or dark circles under your eyes. One trick to achieve flawless makeup is to apply your concealer after you do your eye makeup. This helps to erase any imperfections on the foundation caused by fallout.
You Will Need:
- A concealer (either liquid or stick).
- A beauty blender or concealer brush.
Steps to Conceal:
- With the applicator, apply the concealer on the concerned areas in small dots.
- Then load it on the brush and apply it under your eyes in the shape of an inverted triangle.
- You may also dot it on the inner corner of your eyes. This helps to brighten and open up your eyes.
- Also, apply it to the high points of your face like your chin, forehead, and the bridge of your nose.
- Now use the damp blending brush or beauty blender to blend this evenly into the base foundation.
8.) Put on Makeup to Enhance Features
If you would like to enhance your features further, you can apply a technique called ‘Contouring’. This helps to subtly alter the shape of your face. This process is a combination of applying darker and lighter shades to your face. The dark shade, or contour, gives depth whilst the light shade, or highlight, accentuates your favorite features. Follow these steps to put on makeup so you can create a chiseled look.
You Will Need:
- The contour shade. Or a stick foundation 2 shades darker than your skin tone.
- A highlight shade. Or a stick foundation 2 shades lighter than your skin tone.
- A beauty blender
Steps to Contour:
- First, with the darker color map out your face. Draw over the areas you want to recede.
- Trace along your temples and carry straight into the hairline.
- Draw a line along the dip under your cheekbones to give yourself that defined, chiseled look.
- Shape your nose to make it appear thinner, or longer, according to your preference.
- Trace your jawline as well.
- Take a damp beauty blender and tap along these lines to blend them out.
- Now highlight the areas you want to emphasize. Use the lighter foundation stick to draw on underneath your eyes.
- Place a little on your chin, the center of your forehead, and down the bridge of your nose.
- Use the damp beauty blender to blend out the product.
- With a tapping motion, keep blending till you achieve your desired look.
- Now finish up by lightly dusting across with translucent setting powder. Use a big, fluffy powder brush.
9.) Blush Plus Lips
Put on makeup to complete the look and bring a little life to your face. For this, apply some blush and lip color. Depending on the look you want to achieve, there is a wide range of blush colors. Sweet shades of pink complement fair-to-medium skin tones very well. Peach and orange-based shades are excellent to add a bit of fun on medium-to-olive skin tones. Dusky skin tones will benefit best from rouges and darker pink based blush colors. For your lips, you can choose between a lightweight tinted gloss to a full coverage lipstick.
You Will Need:
- An angled blush brush
- A cream or powder blush
- Your desired shade and formula of lip color
- A lip brush
Steps to Apply:
- For powder blush, load your angled brush with the product and tap once to remove excess.
- Sweep this along your cheekbones for a natural, angular finish. For a sweeter look, dab it over the apples of your cheeks and lightly blend out.
- If you opt for a cream blush, then apply this with your fingers. Use a damp beauty blender to blend out the harsh edges for a natural finish.
- Now apply your chosen lip product. For precision application, use a lip brush to fill in the lips. If you are using a rich lipstick, consider lining your lips with a lip pencil of the same shade.
10.) Set Your Look
Finish off by setting the look. This helps it to last through the day for longer. You can use a setting spray or a translucent setting powder. If you have used a majority of liquid or cream based products, consider using the setting powder. Lightly dust it on with a large fluffy powder brush. On the other hand, if you have used a majority of powder based products, then consider setting the look with a setting spray. The translucent setting powder also helps to achieve a matte finish, while some setting sprays give a more natural and dewy finish. In the end, it is up to you to choose the product according to the look you desire!


